Monday, September 30, 2013

Saving Old Floors


We've tried to preserve the original floors from this 120 year old house as much as possible.  But it hasn't been easy.  There was a lot a lot of work involved.

In the living room and kitchen, we have wide pine boards, that have been covered with carpet for decades.  They have a beautiful patina, that we didn't want to lose by sanding them down.  After thinking through our options, we opted to do a 'buff and coat', which left that beautiful deep color, but added a new layer of protection for years to come.


The back of the house, the new dining room, has an unusual floor.  Most of it has alternating wide and narrow boards across the room.  Many of them are very long - 12-13 feet!  If you buy flooring now, you usually don't get lengths greater than 6 feet.  So these are a wonderful bit of history!

Unfortunately, one section of the room had a big cutout in it, almost like a trap door to the basement.  We had this repaired with other boards from the room and tried to continue the alternating floor boards as much as possible.

What kind of wood is it you ask?  Well, it's pretty interesting - the flooring includes maple, birch and beech.  So it has lots of variation!


The guys had to do a lot of sanding, to get it ready for coating.  They started with a 20 grit paper and worked their way up to get a beautiful finish.


Look how much the first coat of sealer brings out the color in the wood!


And after two additional coats, these old floors are a thing of beauty.

Pin It

Wednesday, September 25, 2013

Kitchen Progress!!!


The kitchen is coming together very quickly.  The guys got the cabinets installed in no time.  The crown molding and decorative trim elements took a little more time, but add those custom touches that make the kitchen look so nice.


As a reminder, here's the 'before' kitchen.  We kept a similar layout, but made it bigger, with more space for the cook.


We all love the key element of the design - a big peninsula that's situated beneath a large antique beam.  It's the perfect place to sit on a bar stool and chat with the chef!  We've also added extra tall cabinets, to provide lots of storage space.  And gleaming new stainless steel appliances.


Another feature of the design:  built-in display cabinets along one wall, with a cozy window seat in between them.  The cabinets will be lighted, with under cabinet lights to provide a bright work space.  And we topped the cabinets with butcher block countertops, to provide a furniture look to the built ins.


The rest of the kitchen has beautiful new granite counter tops.  I love watching the installation process.  Look at the giant slabs of stone they carry in to the house.  To assemble the slabs, they use a contraption they call the 'gorilla', which uses vibration and suction to level the large pieces of stone and provide a uniform line of adhesive to bond the sections together.


But my favorite feature in this new space?  We added a chalkboard to the far wall and framed it with some pieces of salvaged wood we took from the basement.  This is a great space to keep track of family 'to do' items or for whimsical drawings.  Can't wait to try it out!


This week the new light fixtures are going in.  We are using 4 layers of lighting in the kitchen.  1)  We added recessed lights across the ceiling.  2)  We added pendants for task lighting.  I can't wait to show you the Pottery Barn Accordion Pendant light over the peninsula!  3)  We'll also have under counter lighting to make it easy to see when you're doing food prep.  4) And last, but not least, we'll have bright halogen lighting under the exhaust hood.

We still need to get the backsplash and plumbing fixtures in, but it's really coming together quickly.  I hope to have finished photos for you next week!

Want to see all our updates and photos?  Just like us on Facebook!


Pin It

Thursday, September 19, 2013

Exterior Paint Job - Before and After

It was a huge job, but the painters have finished the exterior paint and it looks amazing.

Exterior - Before
As a reminder, we had a lot of prep work done to make the job lead paint safe - see story here.  But that was only the starting point.  Once that was completed, there was still a lot of work to do.


Prepped and ready to paint!
1)  First, they prepped all the old nails with metal primer - creating a dalmation effect, which the kids in the neighborhood thought was really fun!


2)  Next, the guys did two coats of a Peel Bond priming product, to ensure good adhesion with the old siding and fill some of the bumps and ridges.


Back of House - Before


3)  And finally, the finished coats went on the whole house.  As a reminder, here's where we started, right after the garage was removed.


 And here's a first peek of the new rear of the house with the windows and siding complete!
Back of House - After
We still need to get finishing touches (mailbox, house numbers, light fixtures, etc) up, but don't you think it's a nice improvement?


Pin It

Thursday, September 12, 2013

Not a Flip....


I continue to search for a term to replace 'Flip' for the work we do on houses.  Whenever we hear 'Flip', it conjures up an image of  quick, cheap (aka low quality) updates.  I keep thinking there has to be a better term!  But recently, NY Times Travel editor Suzanne MacNeille came up with a great quote in her article about Portland.  She was talking about restaurant design, but I thought it was a perfect way to describe what we try and do with these houses.

Corner Cabinet - 1892 New Englander
Reclaimed Materials:  I'm on a first name basis with the folks at the local salvage yards and Habitat's ReStore.  Our most recent projects have used antique beams from local buildings as well as old doors and hardware.  We also try and reuse all of the existing materials from each house.  Our current project has some wonderful hardware and a built in corner cabinet that we think dates back over 100 years.
Doorknob - 1900 Victorian


Restoration:  Rather than gut each building and replace all the elements with new, we try and restore old plaster, woodwork and architectural elements.  We love steam heating systems and the wonderful old radiators that go with them (seriously, don't you love the heat they throw off in the middle of a cold winter - without drying out the whole house?).  
Window Hardware - 1892 New Englander
Rosettes - pre restoration
Doorknob - 1932 Cottage, pre restoration


Newel Post and Balusters - 1892 
Closet Built Ins
Tapered Columns - 1930 Cottage


Local Craftsmanship:  The team of folks that work on our homes truly are craftsman.  We don't complete a renovation in a few weeks.  It takes months and months to do it right.  The work that these guys do (and they're always guys.....not sure why more women aren't in this business!) is beautiful.  They really care about the quality of the work they do and it shows.  
Waterhouse Builders
So, maybe we don't have a one word replacement for the term 'flip'.  But Reclaimed Materials, Restoration and Local Craftsmanship says it all.


Pin It

Monday, September 9, 2013

Windows, Walls & More


We've gotten so much done in the last couple of weeks, as we put this great old house back together.  I wanted to share a few photos, so you can see our progress.

We replaced the old single pane windows in the back of the house.  And now that the garage isn't there, we were able to add 4 new windows on the east facing wall - flooding the house with morning sunlight!
New Window Getting Added to East Wall
Our friends from Elldee Electric came out and ran power to all the new outlets and lighting fixtures that we are adding. We've installed lots of recessed lighting, as well as cabinet lighting, undercounter lights, and new ceiling fixtures. Can't wait to get the fixtures installed (but we're a long way from that point!).


The drywall guys quickly got to work and we now have real walls in place.  I love watching Dan Caron on stilts, getting all the tape and mud work done.  And it wasn't an easy job.  Working around those antique beams in the master bedroom was a challenge.  But, what a difference walls make!  Oddly, they make the rooms look bigger than just the studs.

The old roof has been stripped (all 3 layers of it!) and new, architectural shingles have been installed.  As well as brand new Velux skylights in the bedrooms and bathroom.

Of course we still have a lot more to do, but it's getting pretty exciting around here!

Pin It

Thursday, September 5, 2013

Design Decisions


I was recently in the paint store and overheard a woman say 'we sold the big kid raising house and now I'm decorating this house just for me'.

It got me to wondering.  How many people feel the same way?  So maybe it's not just empty nesters, but how many people want to decorate a house so it makes them happy?  Something calm and serene?  A place to relax after a crazy day?

I tried to think about that as I choose fabrics and colors for this home.  It's not a big house, just under 1500 square feet.  But with the open floor plan and flowing layout, it feels much larger.  And we want the color palette to flow between the spaces.  The idea of something calming and relaxing is a great goal.

With our proximity to the water and the beach, we used that as inspiration for our color palette.  Watery blues and sandy browns.  And after lots of looking, I decided on this combination of fabrics for the first floor:  


From that, we choose our paint color.  One of my favorites, Benjamin Moore's Green Cast (which always looks like a aqua blue on the wall!).  We'll use this wall color throughout the entire house.  It's a great neutral, with just a touch of soft color.


In the kitchen, we'll build on that with this shimmery glass tile and subway backsplash.  This will provide a nice contrast to the dark brown granite countertops.


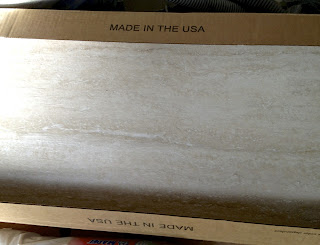
For the kitchen and mudroom floor, I really wanted a travertine marble.  I found one that I loved, but in reality - travertine can be hard to take care of.  Even when coated with a top quality sealer, for hardworking rooms like this, it will end up getting stained.  The first time a Coca Cola spills, or the new puppy has an accident, it will leave a lasting mark. So after lots of searching, I found this USA made porcelain that mimics travertine, but can handle an enormous amount of abuse!

The mudroom and powder room will have the same travertine style tile, but with an added mosaic stripe, to give it a little more design interest.  We'll do the walls with a classic beadboard.  That will let it withstand lots of wear and tear.  But also provides a great design element for coat hooks and decorative elements.

It will be awhile before we can start to get some of these elements in place, but we can't wait to start to see the plans turn into reality.  What do you think?  Calming and relaxing?


Pin It

Tuesday, September 3, 2013

Insulating an Old House

The back part of the house had never been insulated - and of course we want it nice and toasty for the new owners.  But it's a bit tricky figuring out how to insulate a 120 year old space.

Source: Deep Energy Retrofit
Working to our advantage is the balloon framing that we have in the house.  Balloon framing was used in the late 19th and early 20th century when very long, old growth lumber was readily available.  As you can see from this diagram, the wall studs run all the way up the full height of the building.  So we have an open cavity (with no insulation on two walls!) from the foundation all the way up to the roof line!


Shooting dense pack cellulose to the first floor


So, how does that help us?  From an insulation perspective, it allows us to use dense pack blown in cellulose insulation.  Since the back room was never finished, the insulation technicians can blow insulation into the first floor cavities from the unfinished room above - all through the open cavity from the balloon framing.

The guys brought in the truck and loaded the hopper with bales of Greenfibre - a very green product, made from recycled newspaper.  The hopper chops is up and feeds it through what seems like miles of tubing that ran all the way through the house.


Once the first floor is insulated, we add a fire block, and then dense pack the 2nd floor walls.  The guys put a 'web' on the walls and fill it up......sort of like a giant teddy bear.  As you can see, it's messy work and the technicians look a bit like a teddy bear when they're done!

We think the blown in insulation created this creepy discovery the next day.  As Brian was pulling an old door frame out of the first floor, this dolls head popped out (yes, there was screaming, but I won't say who).  We think the doll must have fallen down the opening  between the studs and the force of the blown in insulation pushed it all the way down to the door frame!  Just the head - no body - and the eyes still open and close.

The gabled ceiling required a slightly different approach.  To get an R35 insulation factor, we used a combination of spray foam and dense pack insulation.  This creates a 'hot roof', keeping the space cool in the summer and warm in the winter.  To do that, we had a different crew come out to install a 2" layer of closed cell foam.  Closed cell has an R value of 6.5 per inch, it's watertight and it provides structural strength.


It's nasty stuff during the installation process, however, and requires the use of lots of protective gear.  Once I donned a protective suit and proper respiratory gear - the guys let me capture a few photos as the first foam layer was applied.  It goes on very thin and then quickly expands.  It's applied at high pressure (1100 psi) and gets very hot.  Because of that, they can only apply an inch or two at a time.

Once the foam has had time to cure, the blown in cellulose crew comes in to finish up the gabled peak.  Now it will stay toasty and warm this winter.  Next step - skylight and drywall!

Pin It
Related Posts Plugin for WordPress, Blogger...