As I went back through all the 'Before' photos of this house, it was almost hard to believe how much it has changed. The small, separate rooms are gone. The ceilings have been raised which make it feels so much larger. And the exterior is almost unrecognizable.
So let's take a look back at how we got there!
The original 1952 house had been added onto a few times over the years. And you could tell by looking at the exterior. There were different types of siding, different elevations and it lacked any real architectural style. Our goal was to create a cohesive look for the whole house - while also making some changes to the interior to make the house much more livable.
We eliminated the original front door (the living room would become an en suite bedroom) and highlighted the new entrance by building a mock gable above it. We also installed new doors and windows.
And then we re-sided the whole house, to give it a nice uniform look. The mock shingle vinyl siding looks remarkably real, while providing a maintenance free exterior.
On the back of the house, we rebuilt the failing deck and added a couple of windows to bring more light into the kitchen and dining room. Now it's a great outdoor living area for the new owners, with a big private yard and lots of space to relax and play.
There are just as many changes on the interior as the exterior, starting at the new front door. This area started out as garage storage space - but now it's much more useful as a mud room to shed boots and all that outerwear that we have living in Maine (and did you see that floor??? 💕💕)
I spent weeks stripping layers of paint off this antique newel post and balusters. Doesn't it look great here?
The 'wow' moment comes as you go up the steps and look into the new living area. With walls removed and ceilings raised, this space no longer screams '1952'. It has a warm, welcoming feel with the big island that overlooks the dining and living spaces.
The key to creating this space was removing the walls from the original house. It's a big job - requiring engineered beams to carry the new load. But what a difference!
One of the biggest changes was raising the low ceiling. The new cathedral ceiling, with the antique beams that came from a church in New Brunswick, looks so good!
The old gas logs were torn out and the fireplace was returned to its wood burning origins. We left the original bookcases - they were in good shape - but we added new trim once we raised the cathedral ceiling.

Can you believe the kitchen changes? I'm not sure which is my favorite feature -
the marble backsplash, custom stained glass cabinet, or the big pantry with its antique door.
But there is a lot more. The original living room (which was used as a laundry room) was turned into a bedroom, by removing the old front door and adding a new double window to bring in more light.
And the odd exterior alcove was closed in to create an en suite bathroom.
 |
| Bathroom - Before |
The original hall bath got a much needed makeover. A too wide shower had been installed at some point and made the walkway extremely narrow.
 |
| Bathroom - After |

And the two original bedrooms got new, larger windows to meet fire safety code.
But one of the biggest areas of change was the basement. The previous owner had run an electronics repair business in the basement. It was bursting at the seams with electronics parts, manual and stuff. Lots and lots of stuff!
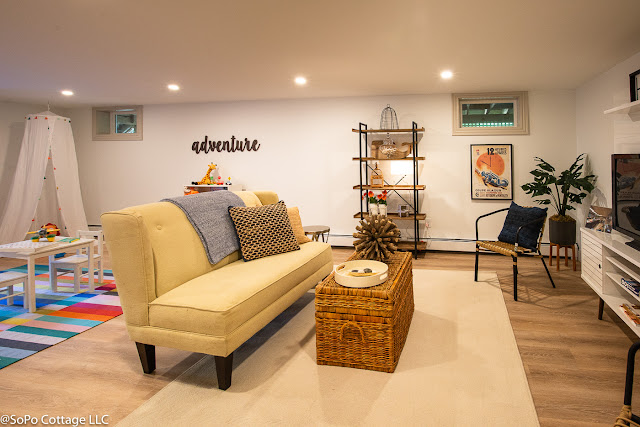
We gutted everything and insulated the walls, before installing new ceilings and walls. Now it's a bright, welcoming space that can be used as a home office, playroom, or whatever else the new owners desire! |
| We gutted everything (except the bookshelves) and opened up the thick concrete wall to the back area |
 |
| Basement - Before |
 |
| Basement - After - Same Photo Angle! Can you believe the change? |
And finally, I have to mention the major overhaul of all the infrastructure in the building. The house didn't have grounded outlets, so we had to rewire everything - including 10 hardwired smoke detectors. We upgraded the insulation throughout and installed a high efficiency heating system - ultimately exceeding our energy goals. And obviously the plumbing was updated with the kitchen and bath work. While this isn't technically a new house - it's pretty darned close!
Best of all, the new owners love it and are happily making it their own home for many years to come. So now we're moving onto our next project - a very cute bungalow! Stay tuned!
Pin It

 But that's not all! The bathroom got a major facelift. Gone are the boring fixtures it started with and now it has a real sense of style with a marble mosaic floor, glass mosaic shower wall and beautiful new fixtures. Pretty fabulous, don't you think?


