Wednesday, December 14, 2022

1898 House - The Floor Plan

Now that you've seen the exterior, here is the interior floor plan.  As I mentioned in my previous post, the basic layout of the house isn't changing much.  But because of all the structural issues we've found, we're going to be gutting a lot more of the house than we had originally planned.  And you know what happens when you open up walls - you find hidden surprises.  So until we know what those are, here is the renovation plan.


What's changed?  Well a lot.... and not so much.  The layout is very similar to the original plan.  But we are taking out walls in the kitchen (shocking I know!) to make it seem much larger.  We will also be opening up the kitchen ceilings, to get a big cathedral ceiling throughout the space. (want to see the original floor plan?  Click here)


We have agonized over the size of the mudroom and the location of the laundry.  And after lots of discussion about the mudroom, we've finally agreed to just figure it out when we start framing that space.  


For the laundry, we really wanted it up on the 2nd floor, but every option we tried had a compromise involved and we finally gave up.  If it has to be on the first floor, we had a couple of options (you guessed it - hubby and I can't agree 😂)  So we let our plumber made the decision, based on where we can access water supply and drains.  It will go in the current first floor bathroom.  Not our preferred location, but we can live with it.  And that's what always happens when you renovate an old house.  You can't always have exactly what you want due to all kinds of structural, code and financial limitations.  So you learn to adapt!


The bathroom used to have two doors - one into the office and one into the kitchen.  We will eliminate the door to the kitchen, which gives us more space for kitchen cabinets and makes bathroom layout a bit simpler.


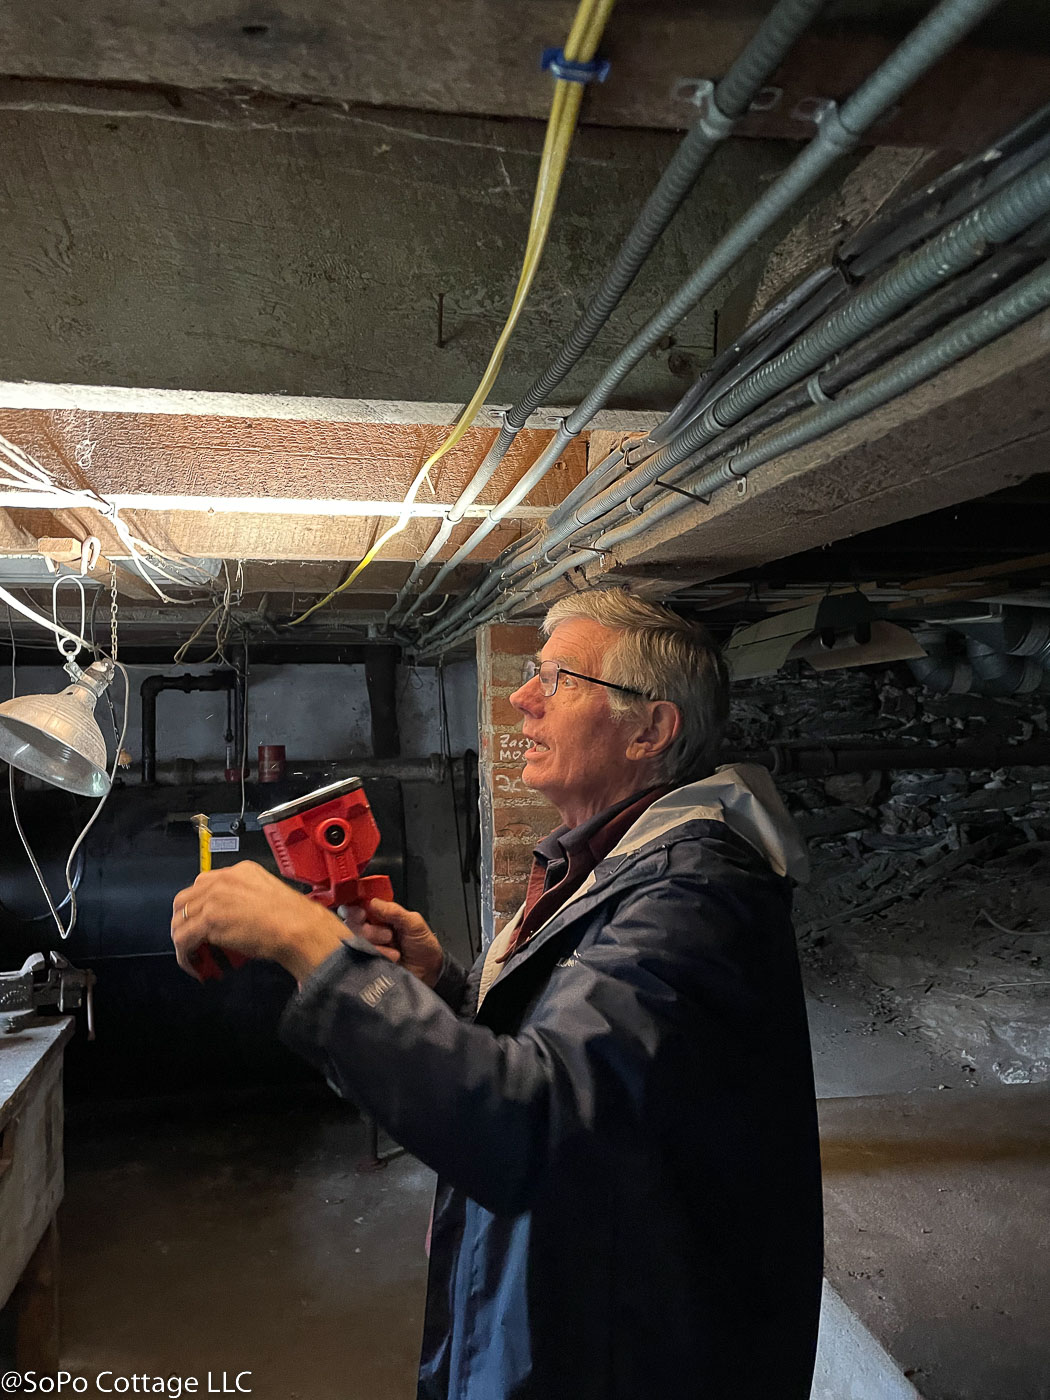
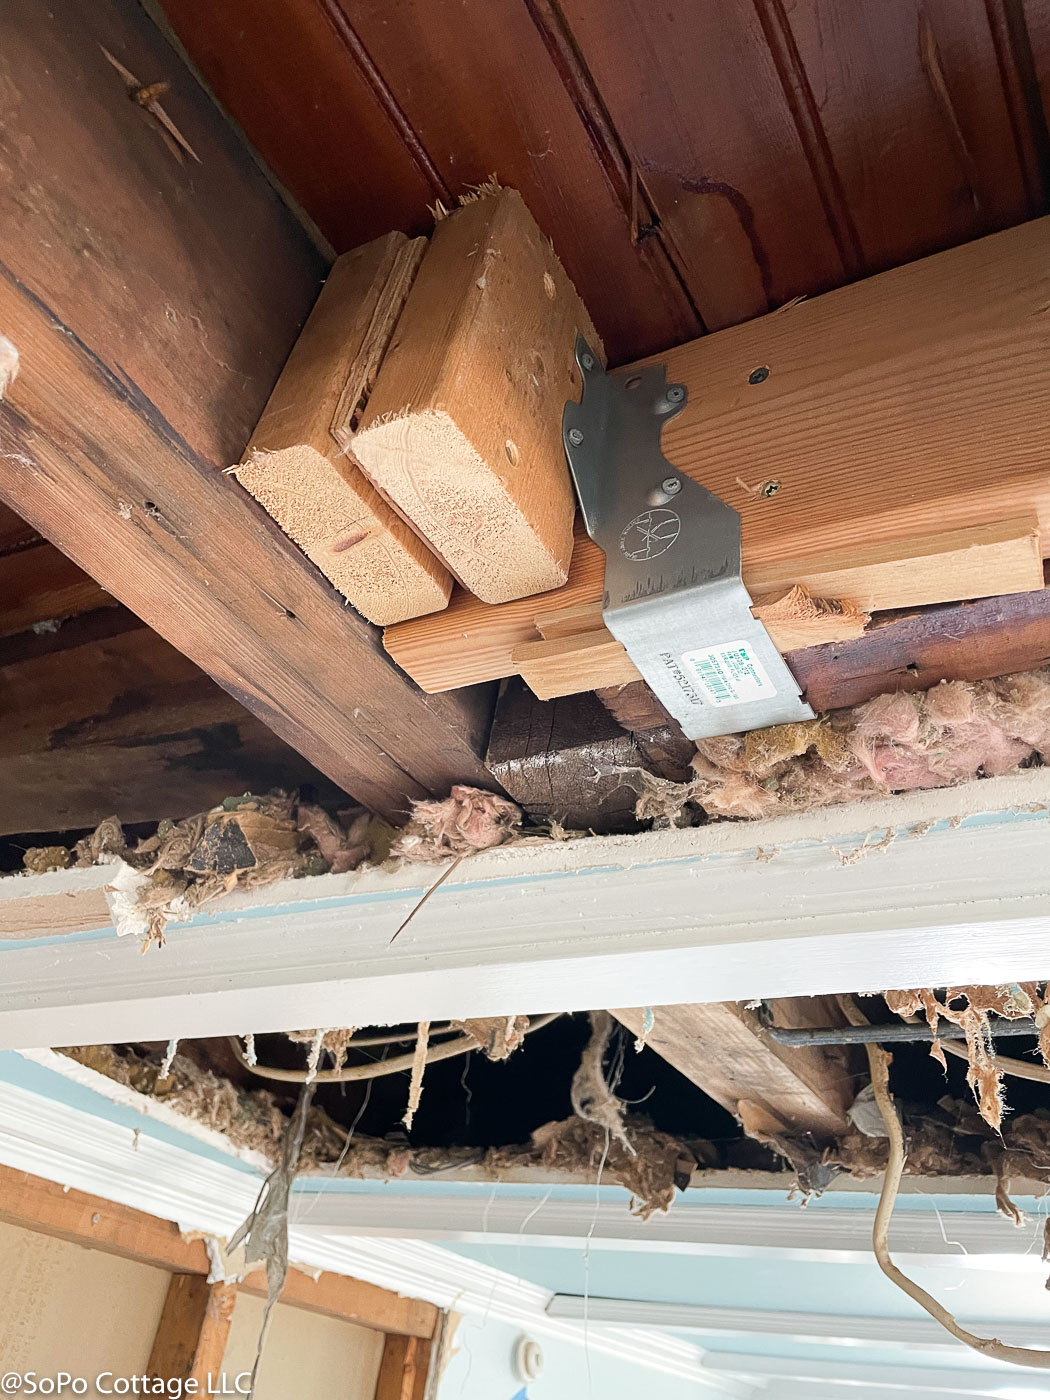
The other big changes include fixing all of the structural issues, padding out the walls to give us more space for insulation and  updating finishes. 


The second floor gets bigger changes.  With the addition of the new shed dormer, we gain about 8 feet of space across the back of the house.  It's not an enormous amount of room, but it gives us some additional space to let us 1) create a bunk room for the grandkids and 2) create a primary suite with bathroom and 3) add an extra bedroom.  Having a second bathroom upstairs was a huge 'must have' for us, so we're glad we could make that happen.


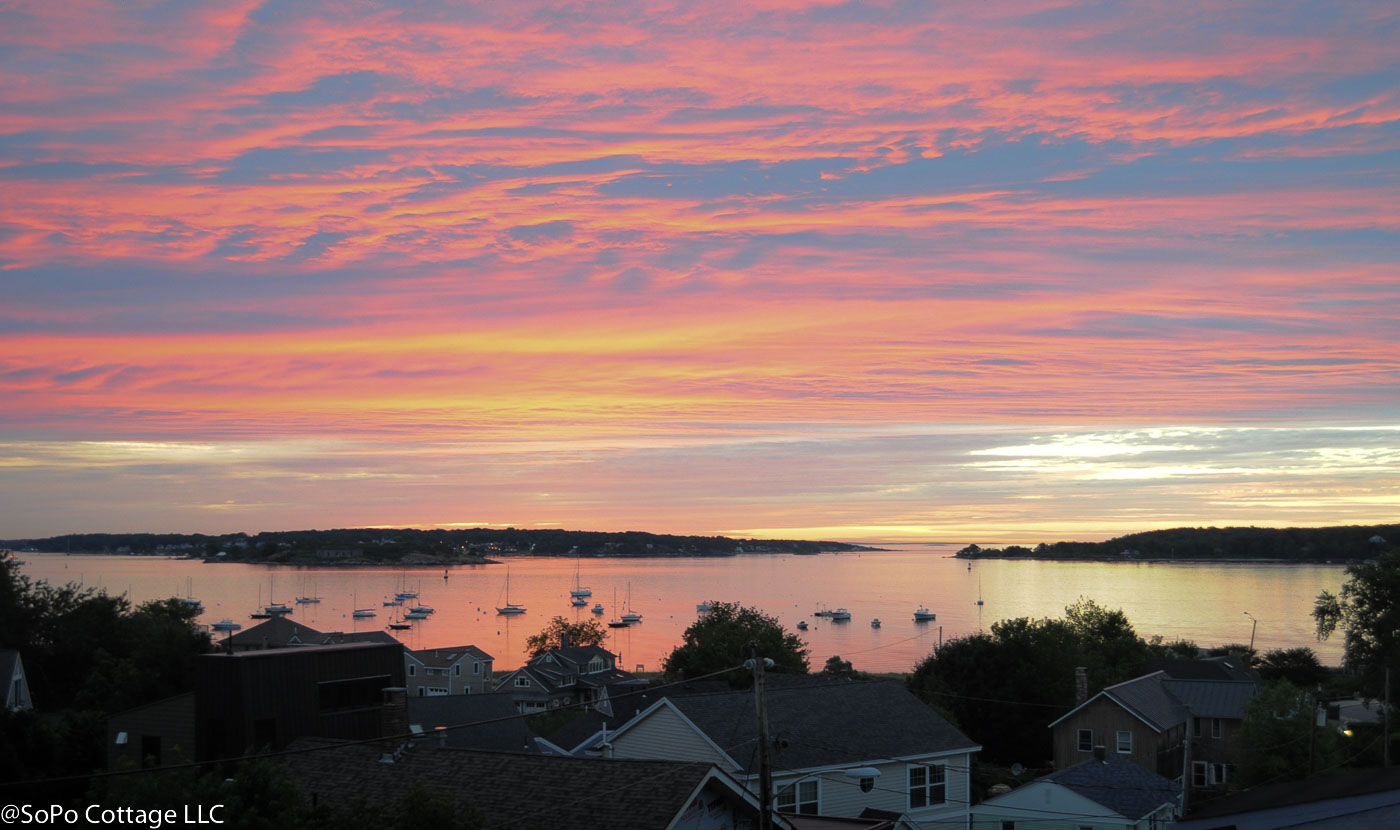
Now that the leaves are off the trees, we're really starting to appreciate the water views.  The front right bedroom will have a glimpse of the Portland Head Light - which is a pretty sweet view no matter what the season. (if the kids all come to visit at once, it will be interesting to see who gets the best guest room! 😂)


The Primary Suite has views of Casco Bay, Cushing  and Peaks Island.  We're looking forward to seeing that view as the sun comes up in the morning!


Of course we're dying to get started!  All the permits applications are in and we're hoping to move forward soon.  


Pin It

Wednesday, December 7, 2022

First Peeks of the Renovation Plan


When we were looking for a new home, we had a set of criteria.
  And while this home met many of them, there were some things that have evolved as we’ve gotten to know the house a bit better.  So here is our latest list.
  •       ~2500 square feet
  • Maintain 'old house' style and charm
  • Open-ish floor plan for entertaining 
  •  Bunkroom for the grandkids
  • Future bedroom on the first floor to age in place
  • Mudroom for all the coats/boots/hats/etc
  • 2nd floor laundry

So let’s go through a few of the key goals, starting with the size of the home.  We don’t want another giant house.  Something around 2,500 square feet will be perfect and since this house is 2,480, it seems like just the right fit. 


A key to this design - a lot of things stay the same.  There isn't any change to the footprint of the house.  And we aren't making many changes to the layout of the house.  All of the rooms stay in their current configuration.  Where we are making changes, it's to correct structural issues that we've found and add a bit of space upstairs for a bunk room and bathroom.


Here's a first look at the exterior.  We're working hard to maintain the 'old house' look on the front facade, but will try and align the windows a bit more.  (Before everyone comments - yes, it would be nice to have another window next to the front porch for symmetry, but that would put it right in the stairwell.  That is a big no-no for building code - and I don't want a fake window that was built behind a wall), To help balance the front elevation, I'm thinking it's a great place to put a trellis with some sort of a climbing vine. I found a nice trellis behind the garage, it was too rotted to reuse, but I saved the brackets from it to create copies for a new one.


On the garage side, we've kept my favorite exterior view with the little vestibule that steps up to the taller kitchen roof.  Seriously, I love this view of the house!  


But if you step back from the door and look at the new design, you also get a first peek of the new shed dormer on the back.  

We will tear off the structurally compromised hip dormer that's currently on the back of the house and replace it with a shed dormer - which is a better match to the front facade.  The hip dormer just looked odd and didn't match anything else on the house.


Best of all, the new dormer will extend to the back of the foundation so all of the building load will be transferred to the foundation - instead of the middle of the dining room!  A win-win from a structural engineering perspective!

Bunkroom at last home
The new shed dormer will give us some additional living area across the back of the 2nd floor.  This will give us bedroom space for when the family comes to visit.  The bunkroom for the grandkids was a huge plus in our previous home (and we only had 3 grandchildren then – with the twins we have 5)  That's a lot of bunks!  And it works well for grownups in a pinch!


It also give us space for two bathrooms on the 2nd floor - a must have for us!


The right side of the house will have lots of windows like we have today, but they will all match, instead of a mixture of styles that we have today.  We will also add a sliding glass door to give us access to the deck that we're planning to build there.
We're pretty pleased with this approach.  It maintains the original character of the house, while providing a bit more bedroom/bath space on the 2nd floor.  And best of all, it fixes a lot of the challenging structural issues that we found when we started opening up a few areas of the house.  

Stay tuned, We're still making a couple of tweaks to the floorplan, but I'll share that soon! 


I

Pin It

Wednesday, November 30, 2022

A Third Floor Deck?

We have a pretty long list of 'must haves' for this house renovation.  And one of them is a third floor deck that we could tuck into the back of the house.  That way it's hidden from the front of the house and it provides lots of privacy.  We had one on another house and it was the perfect perch to get away from it all - to watch the sunrise or have a glass of wine at the end of the day.  We really wanted to have one again. 

Sunrise view from 3rd floor deck at our old house
3rd floor deck - tucked into roofline 

But it's tricky.  To build a deck when you're designing new construction, isn't a big deal.  But to add it on a 100+ year old structure is a lot different.  As we started to look at the feasibility of adding one, we started to realize it would be 1) very expensive and 2) very complicated without adding some unsightly support beams in the rooms below.

We also had some drone photos done at the 3rd floor level and were a bit surprised to see that the view from that elevation wasn't substantially different than the view on the lower levels.  There are some big trees in the neighborhood that we can't see over.  And sure, the view will be better in the winter with no leaves on the trees, but it would be pretty chilly to sit out there in the winter!

We could remove the large tree in the photo below to slightly enhance the view, but it's special to the previous owners and we like how it defines the edge of the yard.  

So guess what, our 'must have' list just got a bit shorter!  We plan a first floor deck off of the living room and that will be enough!  For once, we have selected a money saving option!!! 


Pin It

Wednesday, November 16, 2022

The Ceiling Conundrum

There is so much we love about this house, but one big problem for us is the ceiling height.  We're not super tall people, but a 7 foot 2 inch ceiling is pretty low for most anyone.  I shouldn't be able to touch it with my knuckles! 


We knew this when we bought the house, but we thought maybe we could raise the ceilings.  Many times in old houses, the ceilings have been lowered.  Sometimes it's to hide old, cracking plaster.  Sometimes it's to keep the heat in, so the heat doesn't rise and sit up in a tall ceiling.  We were hoping something like that had happened in our house.  So we started some investigation and opened up a couple of little spots.

And we got some good news - in the kitchen.  The kitchen has 2 layers of ceiling, which gained us about 7 inches of ceiling height.  Not a lot (still not an 8 foot ceiling), but it's an improvement.

In the living room and dining room, we weren't so lucky.  There wasn't any room to be gained.  But we did make an important discovery.  Originally, these ceilings were left exposed!  The joists are all finished and the actual ceiling is fir bead board.  And it's pretty gorgeous! (there are a few nails from the flooring above, but still - it looks nice!)

The underside of the flooring above has bead board paneling.....so it must have been exposed originally!

So the big question is should we expose the ceiling?  Pros: it gives the illusion of a taller ceiling and historically is must have originally been this way.  Cons:  it might not all look as good as the little section that we opened and it doesn't have as much sound isolation between the two floors as a typical finished ceiling.

And to tear the existing ceiling out is a bit of a gamble.  Will all of the ceiling look this nice?  Will we get a nasty surprise?  The existing coffered ceiling looks nice and would be expensive to recreate. 


Honestly, we keep vacillating back and forth.  Stay tuned, eventually we have to make a decision!  What are your thoughts? 


Pin It

Wednesday, November 2, 2022

What Kind of Poop Is That?

What kind of poop is this?  This photo was from the inspection report and it doesn't ID the poop.   It's big (hence the comparison with the VCR tape) and once we looked up in the top of the garage we found a LOT of it!!!  We're still trying to get up the gumption to get it bagged up for the trash - I bought us the kind of Tyvek suit with hoods built in, which I will probably burn when we're done 😂. It won't be a fun job!

And just for background, we've had lots of animal issues in other houses.  Here's the typical Q&A that I get:


Q- Is it normal to have that many animal traps?


A - Probably not!


Q - Have you used them all? 

A - Oh yes indeed! 


Q - Why do you have so many? 

A - Old houses typically come with some kind of critters!!


Q - What have you caught? 

A - Squirrels (lots), chipmunks, neighborhood cats (who are not amused, but seriously, who would have thought they liked peanut butter?), and one skunk. 


Q - What animals do you think come with this house? 

A - We have seen squirrels dart in behind the gutters, chipmunks running through the garage/sunroom, the neighbors told us they've seen a fox that goes in and out of the garage and the previous owners had to have raccoons removed. Oh and it’s time time of year for mice to find homes indoors! 


Oh yeah, it's critter time in this house!!  As we've started investigating, we're finding all kinds of interesting things.


First - meet Mr. Possum.  He's been here a really long time, in a crawl space under the back porch and is essentially just fur and teeth. (and seriously creepy) 


Next - we've watched a squirrel darting in and out of this hole.  When we start doing full demo, we will probably discover where he's living! 


Is that all?  Nope!!  We opened up the dining room ceiling so the structural engineer could see the full impact of the problems to the building.  And then we discovered some critter had been snacking, a lot, on this wood! See all the light areas?  That's where they chewed away all this old wood!


Is that all?  We're not sure yet.  Old houses always have animal infestations, but hopefully we have found them all at this point!!  

Pin It

Wednesday, October 26, 2022

How Old is This House? 1898? Not so fast.....

The City records show that this house was built in 1898.  But was it really built then?  We're not quite sure.

As we look around the basement, you see lots of old, full size lumber with noticeable saw marks.  But as we've started doing some investigational demolition, we are seeing things that make us wonder when the house was really built.  Some of the structure looks much newer - with modern planed lumber.  It's not unusual for houses to get additions over the years, but this one is a bit confusing, to say the least.

My theory:  the original house was probably a small cottage where the current kitchen is -it has a low crawl space instead of a basement under it and we found old clapboards on the interior walls.  But the roofline probably isn't original and then it was added onto again and again over the years. But I couldn't tell what got added on when!

So I called in an expert.  Les Fossel of Restoration Resources has been restoring old houses in Maine since 1975.   I first met him at the Old House Trade Show sponsored by Portland Landmarks a few years ago and marveled at his wealth of knowledge about how to look at all the aspects of an old house - saw marks on wood, lumber dimensions, nails, hardware styles, window placement, etc - to figure out the age of a house.  He also does consulting and I wanted to get his thoughts on the house to see what he can figure out.

We started in the basement - this is full dimensional lumber (aka a 2x4 is really 2" x 4" - not a modern 1.5" x 3.5") with noticeable saw marks.  But interestingly, in an area that we assumed was originally a covered porch, the joists appear much older.  And all of the porch areas have a full basement under them, which is rather unusual (Note: the porches are all enclosed now as part of the house).

On the first floor there are lots of different rooms and they don't all line up nicely.  Again, that's an indicator of a home that's seen lots of additions over the years.  But the most interesting thing was the back of the siding in what will be my husband's office - the siding came from different buildings.  You can tell, because they were all painted different colors on the backside.  Les assumes they came from uninsulated cottages (hence the paint on the backside of the siding) that were torn down and repurposed in this home.  We're starting to think this house should be called 'Thrifty Mainer Builds His Dream House!!

These windows don't look like they came out of the same house.  And again, we see different kinds of siding and markings from a previous life in another house! 

Thrifty Mainer Builds His Dream House

There was a similar 'ah-ha' moment when we looked at the front facade.  Once we cut some of the giant bushes away, we discovered the windows don't line up at all.  In fact, it's almost like they came from different building sites and were just popped in at random!  

And the glider windows that run across the living room don't match any other windows on the house (they're also falling apart).  And check out the attic window (yeah, there isn't any glass in the bottom half)!

The second floor has a big shed dormer across the front and a hip dormer across the back (that's the dormer that has all the structural issues).  But interestingly, you can see where the attic space was  smaller at some point in time.... but it's hard to tell when/why that was changed!  


I tried mapping out some of the things we found, but there are still some mysteries that we may get answers to as demolition continues. 


And what about architectural style???  There are lots of different styles!  When Les looked at the hardware in the house, he said it's a 1920's Colonial Revival style.  We did a lead paint test on the fireplace mantle and it came out negative - so that means it's post 1978 (practically brand new!!).  And the pillars on the front porch are Craftsman/Arts & Crafts Style.  It reminds us of our rescue dog - a super mutt with a little bit of everything mixed in! 

So......the guess is that the house was probably owned by a carpenter who took materials from other jobs and added them into his own home over time.  The kitchen may have been the original cottage, but over the successive decades, new owners made their own imprint on the house as well.  That might explain all the rooflines and mix of styles.

There are so many different rooflines (gable, hip, & shed) and roof pitches on this house!

Les's final guidance was to keep the quirkiness.  Don't try to make it a totally updated home with everything normalized to today's standards.  And we're taking that to heart.  We don't want this to look like a new home or a 'modern farmhouse'.  We want it to reflect it's mixed history across the decades.  

And in the meantime I'm talking with neighbors and the local historical society to see if we can glean any other information.  125 years is a lot of history, so stay tuned for updates as we learn more!


Pin It

Wednesday, October 19, 2022

The Scary Basement

I feel like this blog post needs Halloween music to go with it!  You see, like most old houses, the basement is something that makes you think about slasher movies.  It’s dark.  It’s full of cobwebs.  And we’re pretty sure there are/were animals living down there.

Dirt floor - check.  Asbestos on pipes - check.  Low head room - check.😂


The basement stairs appear to have been an afterthought – they’re more modern with poured concrete walls and must have been put in much later.  There is an exterior door, which was probably the way they entered the basement for decades.


Oddly enough, the stairs appear to have been built into part of the original kitchen, because there are old cabinets on one side of the stairs – including a window that looks out to the sunporch.   And on the other side is a window into the current kitchen.  So strange!  
Cue the spooky music now!!


At the bottom of the stairs is a window – but when you lift it open it looks into another crawl space that also has a window.  Why?  There appears to have been an addition onto the dining room at some point in time. 


But the dominant feature in the basement is all the ledge.  Ledge is the granite rock that exists along the Maine coastline.  It’s extremely hard and difficult to remove and in this case it appears that some previous owners just poured concrete around it.  The center is still exposed ledge with tree trunks as posts, supporting the living room floor.

Tree trunk posts!

The ledge was encapsulated in concrete around the perimeter


Under the kitchen is a crawl space.  This is a rubble foundation – the term for small stones that were sometimes laid dry, sometimes laid with mortar.  Ours appear to have mortar and are in surprisingly good shape.  No scary bows or sections needing major repair (that we can see).  See - sometimes we get good news!


Some of the rubble foundation is exposed, some of it has been parged with concrete, to create a smooth surface.


There is a giant forced-hot air furnace in the basement, with lots of ducts extending all over the basement (It makes me think of a spider with lots and lots of arms).  

So much ductwork!!! 

The ducts appear to have been added at different times and the heating experts I’ve brought in think it’s dubious it would have provided balanced heat throughout the house.  All of the ducts are wrapped with what looks like asbestos tape at the joints, so once again we’ll have an asbestos remediation project ahead of us.  Oh, and the furnace doesn’t work and has a hole in the exhaust that was apparently pumping exhaust fumes into the basement (very, very dangerous, but the basement was so drafty, maybe that kept the danger low??).  Needless to say, that will have to be removed.

Giant old furnace with lots and lots of ductwork snaked all over the basement


And behind the furnace and water heater there is something that looks like a burlap curtain.  Why??  What is it hiding?  No one has been limber/brave enough to climb back there to see what's behind Curtain #1 (does anyone remember Let's Make a Deal??)

What's Behind Curtain #1???


And finally we have what we’ve affectionately called the ‘hobbit’ door. You would have to be pretty tiny to walk upright through this door! This was probably the original entrance to the basement, before the interior staircase was added.  The glass windows provide some nice light, but as you can see at the bottom of the door, there is lots of room for critters to come and go.  We need to fix that, but it’s great to have an exterior entrance/exit for getting work done down there. 


The 'Hobbit Door' provides ventilation (and critter access) at the bottom!!! 😂

Will we be fixing it up as a finished basement?  Very doubtful.  This isn’t a basement that was ever designed to be living space.  But there will still be a LOT of work done down here - we will be updating all the systems, eliminating asbestos and providing energy improvements as part of our renovation.  Not to mention installing a new heating system.  Once it’s a dry, insulated space, it should provide the appropriate foundation for all the other work we need to do.

Pin It

Wednesday, October 12, 2022

Getting Started - Finding the Problems

This tiny little bottle was in the back of a cabinet
As you start pulling back the layers of an old house, you're bound to find problems.  This house has some big structural issues that we saw when we bought it.  And we're fully aware we will find some other surprises as we go along.  That's just the way things go when you're renovating an old house - particularly one that is this old.  (We know of a highly respected builder who came to look at it when it was on the market and recommended tearing it down.  He said there were just too many structural issues and would cost too much to fix them.  Obviously we don't agree, but we know there will be challenges😁) 

But sometimes we also find some cute stuff.  Look at this tiny bottle of rum we found in the back of a cabinet!  

So what's the biggest problem we know about?  First and foremost is the failing back dormer.  We have no idea when this was added, but it's got some serious issues.  Typically when you add a dormer to a home, you put the back side of the dormer over an interior wall or the outside wall, so you can carry all the weight of the dormer to the basement foundation.

That didn't happen here.  The outside of the dormer comes down in the middle of the back sunroom.  And when you look at it from the back, you see it falls in the middle of the dining room.

This hip dormer isn't properly supported below and is sinking into the rooms below

And you can see some of the issues by looking at it from the outside.  Instead of a nice, level line, it's dipping on either side of the stink pipe (that's the cast iron waste pipe that vents to the outside) - particularly on the right side, where it's sinking the most.

And the floor plans really illustrate what's going on.  The corner that is failing the most falls right in the middle of the dining room.  That's not a good way to handle all of that weight!


We've started doing some exploratory demolition to peel back layers and see what's really going on.  And what we discovered is pretty horrifying.  It looks like the dormer was built correctly, but at some point (and judging by the dark oxidation on the wood it was quite awhile ago), someone just cut off the posts holding the dormer up - and transferring all that load to the basement - and figured they weren't needed.  Instead they treated it as a cantilever and built a new wall a couple of feet back.


They did add a few 2x4's in the basement under the new wall that was built (on 24 inch centers!), but they are clearly not handling the load. 


And in the dining room (the spot that has the huge drop in the floor above), someone tried to hang a joist hanger on the ceiling joists (with lots of shims in between), but again, that's not sufficient to handle that much weight from above.  


How can you really tell?  Well if you go into the bedroom above the dining room, you immediately notice the slope of the floor.  I started with the usual marble trick to see if it rolled downhill quickly,


 but followed up with a laser level - which showed the floor drops 4 INCHES in a 7 FOOT wide room!!!  


Sigh.... I hate when we find things like this, but am happy that we can fix it before there is some sort of catastrophic failure.  We're working on a plan now to replace that dormer with one that is properly supported.  It will be a big renovation, but absolutely necessary.

And in the meantime, we'll keep peeling back layers to see what other surprises are waiting for us!  Stay tuned for all the fun! 

Pin It
Related Posts Plugin for WordPress, Blogger...