Tuesday, September 24, 2019

Centennial Cottage: Creating a Plan

So this project has some pretty big challenges.  Lack of headroom for anyone over 5 feet tall, small rooms, leaky windows, etc, etc.  But to really understand how big those challenges are, we need to start with the lot that the house sits on.

This is a typical lot for the neighborhood - about 6,000 square feet.  You can see the existing house on the right side of the lot.  By building code, we can't build in the area 20 feet from the front and back of the lot.  What does that mean?


Part of the house sits outside the 20 foot no-build-zone.  It's existing and therefore 'grandfathered', so it doesn't need to change (they didn't have zoning in 1918!).  But we can't expand in those areas in the setback space. That means no roofline changes - so we can't just build up.  And of course without changing the roofline, we can't fix the headroom problem in the stairwell.  With a house this small, there really isn't an option to move the staircase, that would just make the rooms ridiculously tiny.

What can we do?  Well, we can put on an addition.  It has to fit in that 20 foot front and back setback, so it has to be long and narrow.  But that gives us the opportunity to build a new safe staircase, add a 3rd bedroom with bath and create a bit more elbow room than the current small house has.

So we got to work.  I sketched up an initial plan on my CAD system and then worked with Hammond Lumber to create true drawings.


I really want a house that will fit in with the neighborhood and mirror the style of the original house.  It's a bit tricky with such a narrow addition and we went through a few iterations, but the result will hopefully look like it's always been there.
Starting Point

The new floor plan is far more livable than the original.  As you can see, the first floor of the existing house is very small.
Dining Room - Living Room straight ahead, Kitchen to left
So here's the new plan.  The new front door will open into a foyer with a large living room to the left.  To the right, we've moved the kitchen to a new location - much more central with the new layout.  In fact, we think this might have been the original location of the kitchen!

The dining room stays in the same spot, but we'll make it larger by moving/eliminating some walls and adding a set of sliding doors out to the deck.

What was the kitchen will now be a home office - with the adjacent bathroom.  It might also be a great place for a sofa bed, to provide space for houseguests that need single floor living.
Kitchen today - future home office
I know it's hard to visualize from the blueprints - so here's a 3D blow up of the first floor.  It's so much more spacious!!

The new staircase takes you up to the 2nd floor landing and the master suite.  Gone is the crazy staircase of the original house with the lack of headroom when you get to the landing.
2nd Floor
The Master is a large bedroom that will have a wall of wardrobes for lots of clothes storage.  The bathroom is spacious with a large walk in shower.

It took some work, but we also figured out how to move the washer/dryer up to the 2nd floor.  That will be so much more convenient for the new homeowners.

The two original bedrooms will stay, but we'll reconfigure the closets to make the rooms more spacious.  And by making some changes, the back bedroom can open from the hallway, rather than requiring a path through the bathroom - now that's progress!

The old staircase space will be eliminated and made into part of the hallway.  It's not tall enough to stand upright, but maybe we could create a built in desk and some big closets, for storing bulky items.  You can never have too much closet space!


Best of all, there will be a bonus space on the 3rd floor.  This could be used as an additional office or maybe a spot for the kids to hang out with friends.  There will also be a nice rooftop deck.

This might look like something that came together quickly, but there was a lot of back and forth to really get a design that worked.  Total elapsed time was about 3 months, including paperwork and permitting.  But at long last we're good to go!

This is a much bigger project than what we usually tackle - but the final result should be pretty great!! Stay tuned for lots of progress updates!

Pin It

Wednesday, September 18, 2019

Moving Fast - Asbestos, Paint Colors and More

So for our very first project, we had the folks from Safe Environmental Solutions come in and remove the asbestos siding.  They told me it's a product called Transite, which was very popular in the 50's and 60's.  In the world of asbestos, this is one of the safer types to have.  It's very hard and not very 'friable' - the term for creating dust that creates issues if it is inhaled.

So in theory, we could have left it on the house.  But since we'll be putting on an addition, the siding should all match.  It's an expensive change, but it had to go!

And even though this isn't as dangerous as some other asbestos products, the guys still needed to use all the usual precautions, including lots of plastic to contain any potential dust, hazmat suits, and special containers to seal the shingles.

Oh, and they needed a shower setup, to completely shower off and make sure they didn't have any asbestos on their body when they were done.
What color is lurking beneath the asbestos???
First peek - Black clapboards!!
But the most shocking thing during the process, was discovering the color under the shingles.  It's black, or maybe a deep charcoal gray.  In New England, we have a lot of dark colored homes (in many cases wood shingles that have darkened over time), but I wonder when black was popular??  In the 50's or 60's, before this house was covered in asbestos shingles?  

Which do you like?  Black or Yellow/Aqua???
Once I recovered from the surprise,  I started to like it!  I started to envision how it could look with lots of bright, white trim.  

Who knew a black house could be so charming?
And while I was daydreaming about what color we would use for the house, an email popped up from the neighbors - they would be putting up a new fence in a couple of weeks.  The fence is right next to the shed, so if I wanted to do any painting or maintenance on the shed, it needs to be done now.  And of course the shed siding color and roof need to match the house!
The shed needs some TLC!!
Yikes!  I thought I had months to pick a color and instead I only have a couple of days.  So I got to work. As we've discussed before, when choosing the color for the exterior of the house, you want to pick something different than the neighbors.  There is a LOT of white and blue siding around the house, so those colors went off the list.

I went back into my folder of magazine clippings for color inspiration and was startled to discover I've collected lots of dark gray house photos over the years!!  Maybe this could work!
I've had some of these clippings for years!!!  But still like them!
And I saw this on Pinterest, which is pretty gorgeous!  Black with lots of white and a pop of color on the front door!


We are going to use Hardie Plank Siding on the house and thankfully they have a limited number of colors.  I picked out the 3 I liked best - one bold dark black/gray, one a bit edgy and one 'safe' choice.
Northwest exposure
Same colors - but don't they look different in this light???

I've put them on the main body of the house and on the shed, to see them in different light.  Isn't it amazing how different they look on different walls?  I've started getting input from some of the neighbors and have until tomorrow to make the decision!  This feels like such a nail biter!  Do you have a favorite?  


Pin It

Wednesday, September 11, 2019

The Centennial Cottage

There she is, our newest project!!!  The Centennial Cottage - well actually, built in 1918, she's 101 years old.  And she's seen a lot of updates over the years.  The first update you can see right away - asbestos siding (ugh!  One of these days I'd like to do a project without asbestos remediation!).  And there are even more updates inside.

What do I love about this house?  It's the old real estate mantra - LOCATION, LOCATION, LOCATION!!!  Just half a block from the beach, it's on a nice sized lot with lots of privacy.  What?  Privacy close to the beach???  How can that be?  Most beach houses are so closely set,  you can practically pass a borrowed cup of sugar to your neighbor through the windows.

Well this lucky house is at the end of a dead end street with backyards from other houses surrounding it.  The views are so lovely!
Dining Room View
And it backs up to a condo association that has a huge meadow.  There are wildflowers, beautiful gardens - oh, and the beach!!
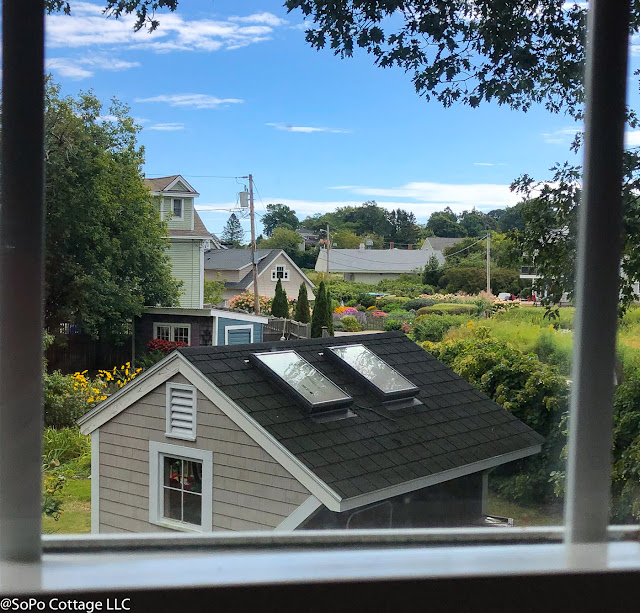
This deck looks out over the soon-to-be cute little shed and meadow - what a relaxing view for your morning cup of coffee!

And there is something about a gambrel roofline that makes my heart go a flutter.  It's such a New England element and when it's on a beach cottage, it's even better!

What else do I love?  The light!!  The living spaces in this house are flooded with sunlight and it's so light and bright!  That's something that we really can't fix, if a house has a lot of north facing windows or huge evergreen trees next to it, you'll never have a lot of light coming in - so it's a huge plus.

What don't I love?  Well, it's tiny.  814 square feet to be exact.  So everything is really tight inside.

And with all the updates over the years, they tore out every single bit of antique architectural interest.  Seriously, it's all drywall and knotty pine trim.  And ceiling fans..... there are a lot of ceiling fans.....
Living Room
Living Room - with an odd little cubby in the wall.....not sure why
Dining Room with Keyhole Opening to Kitchen (why???)
Oh, and a boob light in the dining room.
Kitchen Peek through keyhole opening
See, the kitchen doesn't have anything that looks like an old house, except maybe the hole we ripped in the ceiling to verify the joist spacing!!
And a 1960's newel post.
It's devoid of old house charm.  And I haven't quite figured out what to do about that.  Do we recreate it in antique style?  Or do I give it a more contemporary vibe, since I won't be destroying anything.
First floor bathroom
And then there's the tall person problem (and I am a tall person!).  This place must have had a lot of petite owners over the years.  Case in point, look at this shower!  John would have to do some sort of limbo move to wash his hair!

And the upstairs ceiling fans could scalp a tall person!

But wait, that's not all!  The staircase is a NIGHTMARE!!  The steps have a rise of 9" (typical is 7") and when you get to the top of the stairs, you have to do this weird 'twist and duck' motion so you don't hit your head and shoulder.  It's a challenge for those of us that are tall!  And then there's the whole issue of getting furniture upstairs.  We had lovely tenants living here over the summer and they had to leave their queen sized bed in the living room, because it couldn't make it up the stairs.

This whole hallway is a challenge!  Very narrow with a steep sloped ceiling.

Okay I lied, there is one antique item - this octagonal bathtub is pretty cool.  So there is one 'keeper' architectural element.  I've never seen one like this before and am curious if we'll find a date stamped on the bottom of it.


But as cool as that bathtub is, it's can't hide the fact that you have to walk through the bathroom to get to the bedroom.  Interesting design choice, don't you think?  
Bedroom #2 - you have to walk through the bathroom to get there!
And another ceiling fan!  
And then there is this tiny, tiny room.  The previous owners used it as a short term rental property and had a twin bed in here - tucked into the closet.  But not surprisingly, the City does not count this as a bedroom.  So it's sort of a closet room???

So what do you think?  I've spent the whole summer working on the plans, but I'm curious what your first thoughts are!


Pin It

Wednesday, September 4, 2019

Creating an Energy Efficient Old House

Polar Coaster Winter Ahead (photo: Farmers' Almanac)
With Labor Day behind us, it's time to start thinking about cooler temperatures, because in Maine, winter will be here soon.  And with the Farmer's Almanac promising a 'Polar Coaster'  and a 'wild ride' this winter, we will be testing all the energy efficiency work we did on our mid-century modern house.  This house was built before the oil embargo of the 1970's, so energy efficiency wasn't a priority!  It needed lots of updates.


Energy Audit - looking for issues during blower door test
How do you even start improving the efficiency of an old house?  Well there are some big ticket items you can do, but some simple DIY improvements can make a big improvement too.  And we started with an energy audit, that helped us identify areas to improve.  The audit showed us that we had a lot of air leaks, thanks to a blower door test that identified lots of areas to make improvements.

What did we do?  Well let's start with the big ticket items.  The biggest bang for your buck in insulating an old house, is to improve the insulation in the roof.  Since half of the house was 'stick built', meaning it used conventional lumber and framing practices, we focused on that roof first.  With our low slung, contemporary roof, we don't have a conventional attic.  So we drilled holes in all the different rafter bays and filled them with dense pack cellulose.  With our 2x12 construction, that gives us an R value of 42.
Dense pack cellulose is blown in through holes in a fabric membrane, to keep it in place
PLUS, we added a layer of foam insulation board over top of that, with a new rubber membrane roof above it.  That brings total roof insulation to 60.  That's a HUGE change from the crumpled R-19 insulation that we found when we opened up the ceilings.  
Foam insulation getting lifted up to roof
We also installed a high efficiency propane boiler, which runs at 95% efficiency!  The old boiler ran on oil and was original to the house.  It was held together with silicone and bailing wire, so it was time for an update.

We also replaced every single window, door and skylight with new, energy efficient versions.
The new 8x8' skylight replaced single pane glass that was siliconed to the roof rafters
And while the new units are important to improve efficiency, it's just as important to create a tight seal around every single window/door/skylightof, in our case with low expanding foam insulation (the stuff you buy in a can) to get an incredibly robust seal.  Why low expanding?  Because you don't want the foam to expand so much that it warps your door or window.

But even with these changes, we are still seeing high heating bills.  So we had our insulators come back and install foam insulation in the sills around the basement ceilings.  This might seem like a low payback project, but we immediately saw a 10% reduction in our heating bills!!  That's a big change for such a little job.  And it probably helped that we also installed foam insulation board on the basement walls.
Foam insulation applied to the sills in the basement ceiling made a huge difference in our heating bills

And since we were buying new appliances anyway, we made sure they were all Energy Star compliant.

But we also did a lot of simple DIY changes.  We switched to all LED lightbulbs, which use a minimal amount of electricity. And I went around the entire house with my infrared camera (available to attach to your cell phone and very easy to use) and a caulk gun and caulked every single little air pathway I could find.
Blue is cold..... see how there was a draft coming up from the floor?
Foam board against the slab foundation
We were also advised by our energy auditor to dig a trench around our slab foundation and insert foam insulation board.  He said this provides a thermal barrier between the concrete and the cold ground and was one of the biggest improvement actions we could take.  We obviously couldn't do this in a Maine winter, but finished this up over the summer and are anxious to see how much of a difference it makes.  

But of course the proof is in the pudding.  As you might remember, we did a Blower Door Test when we first started the project.  This essentially creates a giant vacuum in your house, so you can see how much air infiltration you have.  
I was VERY excited to see the improvement.  So excited, that Justin told me not to get my hopes up.  He typically only sees a 10% improvement in an old house of this size.  So as he hooked up the giant fan in the doorway, I waited with baited breath.
30% IMPROVEMENT!!!  Woo hoo!!
And guess what???  We saw a 30% improvement!!!  He was amazed, I was thrilled and we are hoping that will translate into some sweet heating bills this winter.  And it's important to note that while expensive things like new windows and doors help, it's the simple work of sealing up every possible crevice, to ensure no air is getting through that can make a huge difference.

Finally, we are working with our energy auditor to get credits back from Efficiency Maine.  In our state, which has some of the oldest housing stock in the country, there are lots of rebates to help you made your place more efficient.  So we will be getting a nice rebate check for some of the work we did.  

So come on Polar Coaster - we're ready for you!!!
January 2019


Pin It
Related Posts Plugin for WordPress, Blogger...