Showing posts with label bungalow renovation. Show all posts

Wednesday, April 7, 2021

Every Old House Needs a Fireplace


Have I mentioned how much I love my job???  I have the amazing opportunity to work with incredibly creative people.  And this fireplace project is a perfect example.

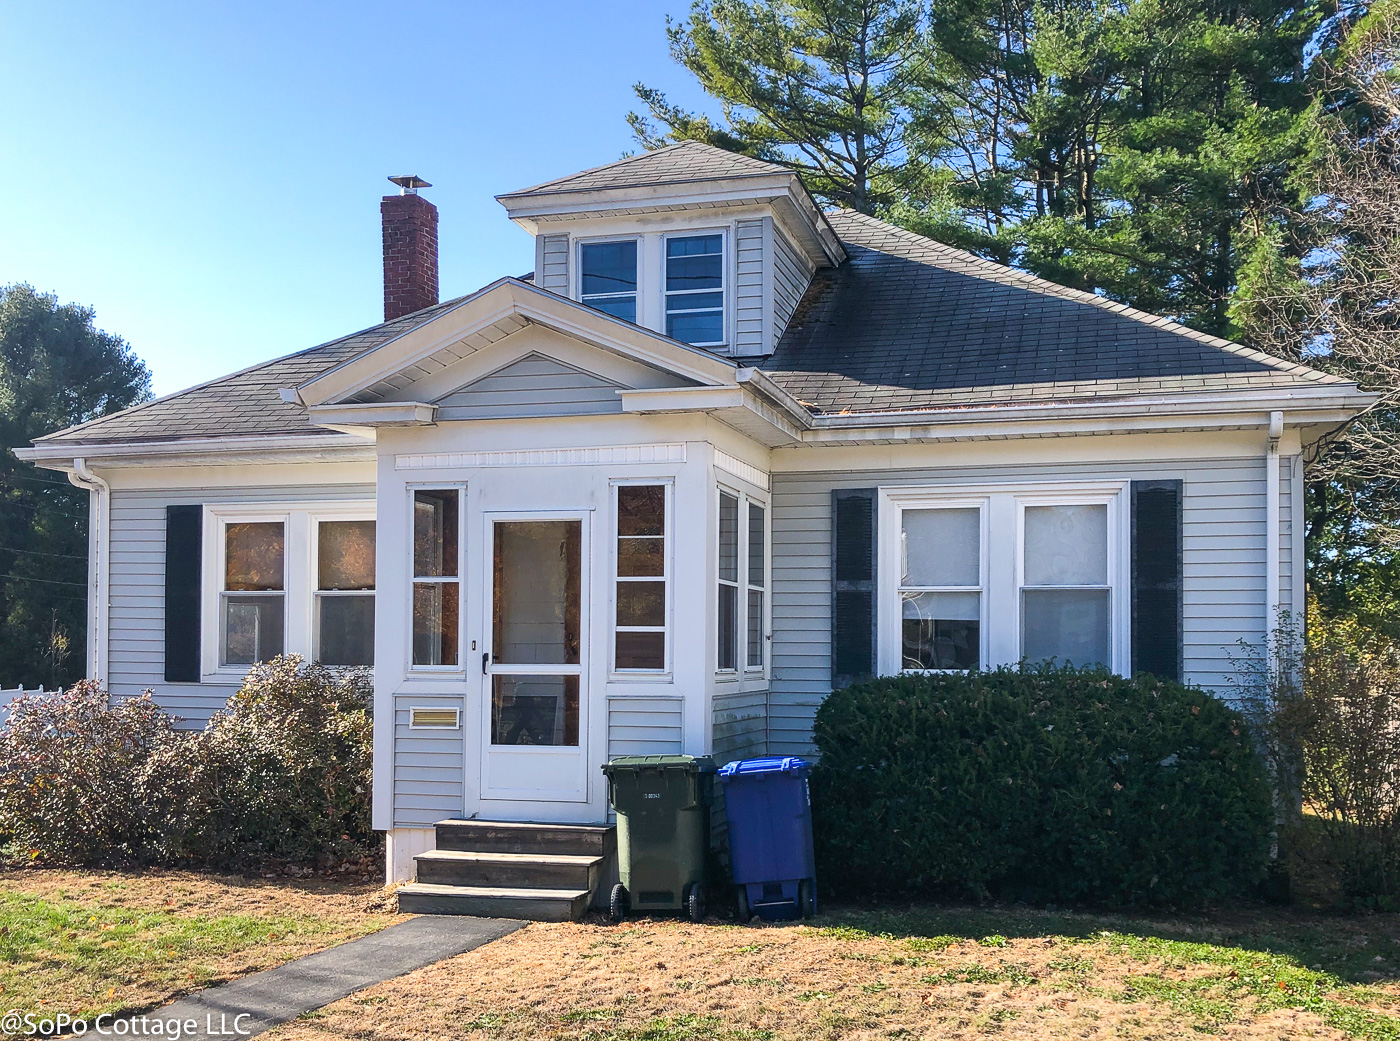
But let's start at the beginning.   Remember when I shared the history of bungalows in America (click here)?  Almost every one of the examples had a fireplace in the living room.  It was a critical element of the home - symbolizing warmth and coziness and all things bungalow.

But we don't have one.

And that made me kind of crazy.  This house really needs a fireplace.  It will make it so charming! But we don't have gas and there's no logical place for a masonry chimney (and our budget could never afford that).  The solution?  An electric fireplace.  We used an electric fireplace on another project and they look so good - not like the plastic logs with a pink lightbulb behind them that my Aunt Audrey had in her living room when I was growing up 😂.  They've come a long way!!!  And from a climate/energy efficiency standpoint, they make a huge amount of sense.  


I did a lot of research and found a unit that can be recessed in the wall, like a real fireplace.  But buying online was scary, so I was thrilled that the local folks at Embers Stove Shop had one on display that I could look at.  Sure, if you look closely you can tell it's not the real thing - but it's still pretty great!  And in person you can see the flickering flames which look fantastic.
 

But I can't just slap it on the wall.  It needs a distinctive mantle.  And I really wanted an antique one.  So I took a little field trip down the the Old House Parts in Kennebunk and started looking around.  They had lots of options, but I was really intrigued by this one - which was miscellaneous pieces of an original fireplace mantle.  Something about it really called out to me - I loved the carvings, but also its simplicity.  This isn't a big fancy house and this seemed to be a great option.

Not too fancy, not too plain - it's just right for the bungalow!


So I bought it and threw it in my van, but needed to figure out how to get the missing pieces fabricated.  

And that's when I contacted Sten Havumaki at Oak & Laurel Workshop.  I'd been following the work he does on Instagram for awhile (you're not following him?  You should be!).  He does AMAZING work, but I was worried this was a bit too simple for his skill level.
 

Thankfully he agreed to take a look at my pile of mantle parts, to see what he could do.  Walking into his shop was a real treat.  It's filled with templates and sketches and work in progress.  You see, he started wood carving as a kid and realized it was something he really enjoyed.  He worked with a local woodcarver in high school and the went to school for furniture makers.  Ultimately, he set up shop in Biddeford, Maine.  He does that kind of old-school craftsman work that you don't see much anymore. 


This sign and carved bird are from a sign he made to hang in front of his parents garage as a teenager.


I marveled at a project he's working on for a house on one of the local islands.  The owners want it to have a lot of Swedish style carvings, inspired by the work of Carl Larsson.

 The sketches he's done give you an idea of the intricacies required to execute their vision.  

This carving in mahogany, for an arch over the front door, gives you an idea of his skill level.  

And thankfully, he was game to create new replacements for the missing parts of my mantle, as well as repair a broken pieces.  It's incredibly exacting work - that takes a skilled hand and eye, as well as sharp tools.


And the finished product?  Doesn't it look great!  We worked together to decide on the size of the plinth blocks and mantle shelf and I'm just thrilled with the result.  
I'm going to tackle the staining and finishing of the mantle, which will be a bit tricky as I try to blend old and new.  Sten recommended stain and shellac (which I haven't used before) and was kind enough to create a guide with several different options depending how dark, shiny or matte I want the final piece to look.   I'm a bit nervous to get started, but am excited to see how it will look when it's finished and installed. 
This will be a long project, so stay tuned for updates!  

Pin It

Wednesday, March 31, 2021

2nd Floor Living - It's Getting Real!!!

Now the real fun starts!!  Since we have a hip roof on the second floor, the usable floor space is quite small, due to limited headroom.  The solution is to add two more dormers to create more living space.  But cutting giant holes in the roof is always a bit nerve wracking, so we wanted to have everything lined up and hoped that Mother Nature would cooperate (seriously, who am I kidding.  Does the weather ever cooperate?) 

Isn't this crazy???


Day 1 - So on a bright Monday morning, the guys got the roof supported and started cutting holes.  With multiple saws-all going at the same time, they made pretty quick work of it and the sections started to open up.


Getting a chance to see the future view was pretty exciting.
View from Bedroom - pretty sweet!!!

View from the other direction - Yikes! 
And even the bathroom will have a pretty nice view.

Day 2 - Next they started framing and getting everything stabilized for the new walls.  There's a lot of engineered lumber going in, to ensure we have a nice rigid structure.  The wall framing started going up and it's looking good.


Day 3 - And then the weather forecast changed.  Instead of a nice, dry week, there were now thunderstorms and rain in the forecast - never good news with the roof wide open.  I made a quick trip to the lumberyard to grabs sheathing and tarps, to try and close walls up quickly. 


The guys did an amazing job of wrapping the roof in blue tarps to keep the water out.  We had an initial storm come through and only had a little water come in.  Thankfully some buckets did the trick to capture it.

Storm 2 came over the weekend and thanks to some frequent visits to dump water and move buckets around - we survived the storm.  My biggest worry was protecting those beautiful hardwood floors on the first floor.  Thankfully they came through just fine.  But this is not fun - we need some clear weather to make some progress.

And while we still have a lot to do, even with the 'blue roof', you can already see how the space is opening up.  As you get to the top of the stairs, the whole space seems so nice and open.  What a huge change!  


We have so much more to do - but it's getting pretty exciting!  Progress continues this week - but it's still blue tarp time to get us through tonight's storm.  Stay tuned! 

Pin It

Tuesday, February 2, 2021

So What Exactly is a Bungalow?

A bungalow!  Whenever I tell people I'm working on a bungalow for my next project, I get a warm reaction.  "Oh.... they're my favorite". Or "I love bungalows!!" And why is that?  They're not big, grand homes.  They don't have modern 'must have' amenities like big closets and bathrooms.  And yet they're clearly a style that appeals to many, many people.


So it got me to thinking and prompted some research.


 I have to confess.  I adore bungalows.  I have a lot of books on bungalows and this gave me an excuse to buy a couple more, adding to my architectural library.  From that research, here's what I know.


Bungalows actually started in India as living quarters for officers.  This was adopted by the British and soon bungalows began to spring up in the UK.  It was perfect timing, people were tiring of the highly ornate Victorian style and wanted something much simpler, that celebrated hand crafted artistry.  These designs became very popular.  Much of the styling that we recognize today came from William Morris, sometimes thought of as the father of Arts & Crafts style - whose designs still make me swoon today.  His quote "have nothing in your house that you do not believe to be beautiful" is still one of my favorites.


Source:  Antique Home Style
The jump across the Atlantic happened around the turn of the century.  California became a bit of a mecca for bungalows, which were quickly renamed 'California Bungalows'.  This is when some of the bungalow style began to get copied.  The catalog companies that sold kit homes realized these houses could have mass appeal across the country.  Soon, Sears Roebuck and Aladdin Homes were selling them from coast to coast.  Bungalows quickly became one of the most popular styles of the 1900-1930 time period.  And on the east coast, Gustav Stickley set up his Craftsman Farms in Parsippany, NJ (a great museum house to visit if you get a chance) and created a magazine called The Craftsman, which highlighted Arts & Crafts styling.  In the magazine, he published a series of Craftsman style bungalow floor plans that were quickly adopted across the country.

But not all bungalows look alike.  Many have quintessential craftsman features, but others seem to have features that reflect colonial or even some Victorian features.  That seems to be particularly true here in Maine - where some styles may have taken a bit longer to make their way north.


There are some key features that are expected on any bungalow exterior- 

  • 1 to 1 1/2 stories with low pitched roof
  • Large overhanging eaves, often with exposed rafter tails
  • Front porch with columns
  • Double hung windows
  • Low slung dormers
  • Often used local materials and earthy color scheme
    Source:  Antique Home Style, Aladdin Portland Model
 Interior features also have standard features (we'll talk a lot more about this in future posts!)
  • Front door opens directly into living room
  • Early version of open floor plan (but kitchen was still small and hidden away for the woman of the house)
  • Minimal wasted space - aka hallways
  • Lots of built-ins to maximize space and efficiency
  • 'Sanitary' bathrooms with easy to clean surfaces
We have a lot of bungalows in South Portland that reflect a variety of styles.  I spent some time driving around the area (I'm sure I looked like some kind of stalker, especially when I started taking photos!) to get a better feel for them.  There are some fabulous Craftsman style bungalows in the Willard Beach neighborhood.  Look at how similar this one is to an Aladdin kit home in the photo above!
This charming little blue bungalow was across the street from one of our previous projects.  Isn't it adorable?   Again, note the broad eaves and the exposed rafter tails.  Stone pillars built from local stone are also very typical.


Portland Landmarks has a great publication on their website (What Do We Call It?) that identifies architectural styles in Maine.  There are a lot of homes like this in the area and the left one looks a lot more like our project than the ones with more obvious Craftsman details like exposed rafters. 
Source:  What Do We Call It? Joyce K Bibber/Portland Landmarks


This will be the third bungalow that I've had the opportunity to renovate. Do you remember project #6?


It was a funky bungalow with some charming features -  and some not-so-charming elements - like the odd staircase that went through the back bedroom.  We gave it a great update and and enhanced its Arts & Crafts style.  You can see the whole renovation in the link here.

Bungalow - Before
Bungalow - After


A few years later we did a larger bungalow that had the classic low pitched hip roof - with a porch across the front (very similar to the one in the style guide above).  It had been beautifully maintained over the years, but somehow the 2nd floor had remained unfinished space. What a great opportunity!   We added a large shed gable on one side, which gave us the space to provide two bedrooms and a large bath upstairs.  You can check out the whole renovation here


And now this project is on the drawing board.  I'm deep into the planning phase and I'll share more as it all comes together.


Pin It

Tuesday, July 26, 2016

Cherished Bungalow - Before and After Second Floor

While we made a lot of changes on the first floor of the bungalow, the most dramatic change was on the second floor.  We started with an unfinished attic and transformed it into two bedrooms, a large bath and a loft.  An shed dormer made all the difference!

But it wasn't easy.  The first step was to cut a big hole in the roof, to make way for a large dormer addition (can you see all those nice water views??).  We saved all the lumber from the demolition and used it throughout the house - you'll see that in the photos!

Before the dormer, you really couldn't walk on that side of the stairwell, due to the limited headroom.

Now, its a big master bedroom with views of the Portland skyline.  And in the winter, when the leaves are off the trees, you have views of Fort Gorges, in the middle of Casco Bay.
The closets are flanked by barn doors, made from the old roof sheathing that we cut away from the roof.  

The original back dormer was reimagined to create a relaxing, spa-like bathroom.  
Dormer Bathroom - Before
Dormer Bathroom - After


Again, we used the reclaimed lumber - this time to create a feature wall behind the soaking tub.  And the old rafters became collar ties.

The front bedroom was created in a dormer as well.  It has lots of funky angles, that give the room lots of character!


Front bedroom - Before
We reframed much of the dormer, to create more headroom and added lots of storage space in the eaves of the roof.  New, larger windows were installed, to meet code requirements for egress.

Front bedroom - After (Photo credit - Coopdujour Photography)

We also included some built in bookshelves, to provide a spot for displaying lots of treasures! 


At the top of the stairs is the new loft space.  With its big skylight, the loft has room for a desk, an occasional chair and lots of shelving.  It could be a craft space, an office space or just a place to sit and relax!


Thanks for following along on our project!  And be sure to 'like' us on Facebook to see all the updates on our next house - the Gracious Gambrel.
Project #9


Pin It
Related Posts Plugin for WordPress, Blogger...